
These extension roof repairs in Clonsilla brought together ridge cap repointing, valley sealing, liquid waterproofing and new dry verge covers. The work followed an inspection of the existing roof area, with attention to the joints and edges that help keep rain out.
The before photographs show worn ridge mortar and debris collected in the roof channels. The finished views show fresh pointing, treated junctions and protective covers along the gable edges. We kept the existing roof covering and repaired the details around it.
On this Clonsilla extension, we renewed the mortar around the ridge caps, cleared and sealed the valley, applied Mariseal Detail waterproofing at vulnerable roof junctions and fitted dry verge units. Each task had a separate purpose, from keeping drainage channels clear to protecting exposed tile ends. The work also included clearing job-related waste from the gutters and removing debris from the site.
Does your extension roof need attention?
Tell us what you have noticed. We can assess the ridge, roof channels and edges, then explain the proposed repairs.
✅ Free Quote • No Hidden Costs • Same-Day Response
The scope of these extension roof repairs in Clonsilla
The extension has a tiled roof, rooflights and junctions alongside an adjoining flat roof area. Water needs a clear route through those channels, while the joints around the caps and flashing need weather protection.
The repair scope covered the following:
| Detail | Work completed | What it does |
|---|---|---|
| Ridge caps | Remove failed pointing and renew the mortar | Repair the exposed mortar around the caps |
| Valley and flashing | Clear debris, inspect and seal joints | Restore a clear channel and treat vulnerable seams |
| Critical roof junctions | Clean, prepare and apply Mariseal Detail | Add liquid waterproofing at the treated details |
| Gable edges | Fit dry verge units | Cover and mechanically fix the exposed tile-edge detail |
| Work areas and gutters | Clear job waste and remove debris | Leave the work areas clear of materials from the repairs |
The coating work focused on critical junctions and vulnerable areas. The scope did not include replacing the roof covering or coating the full surface of the adjoining flat roof.
You can see the complete sequence in the full extension project gallery, which contains all 19 photographs.
Fresh mortar around the ridge caps
Ridge caps are the shaped tiles that cover the top joint between roof slopes. Pointing is the exposed mortar around them. In the before view, the mortar edges are worn and uneven.
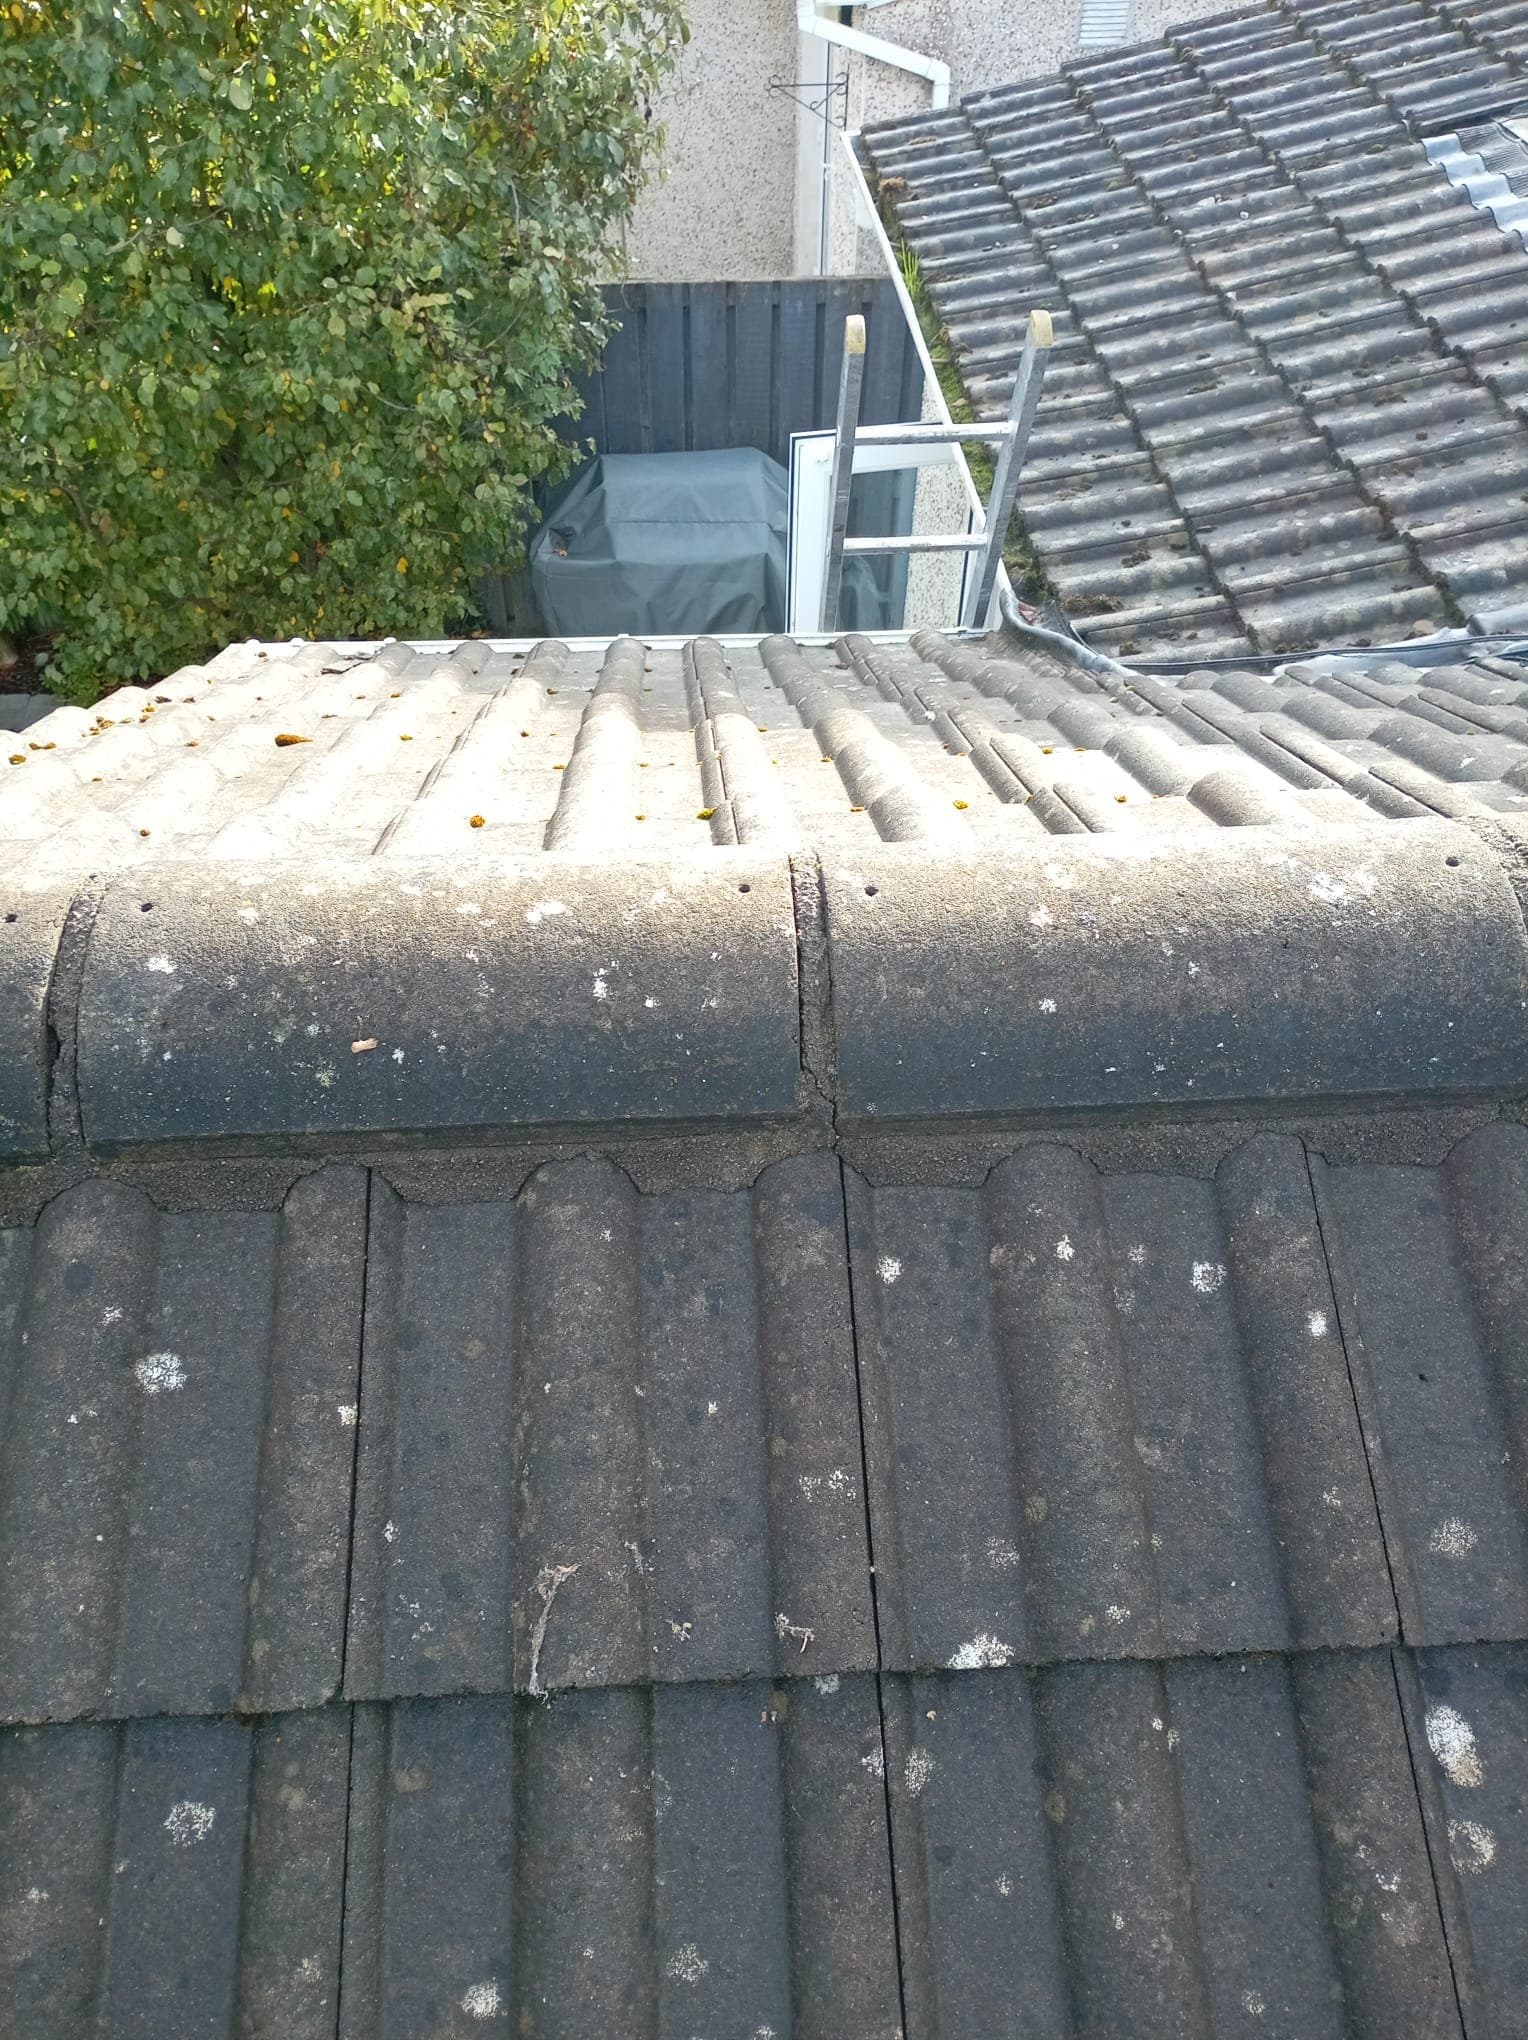
Before: the existing mortar around the ridge caps, photographed before repointing.
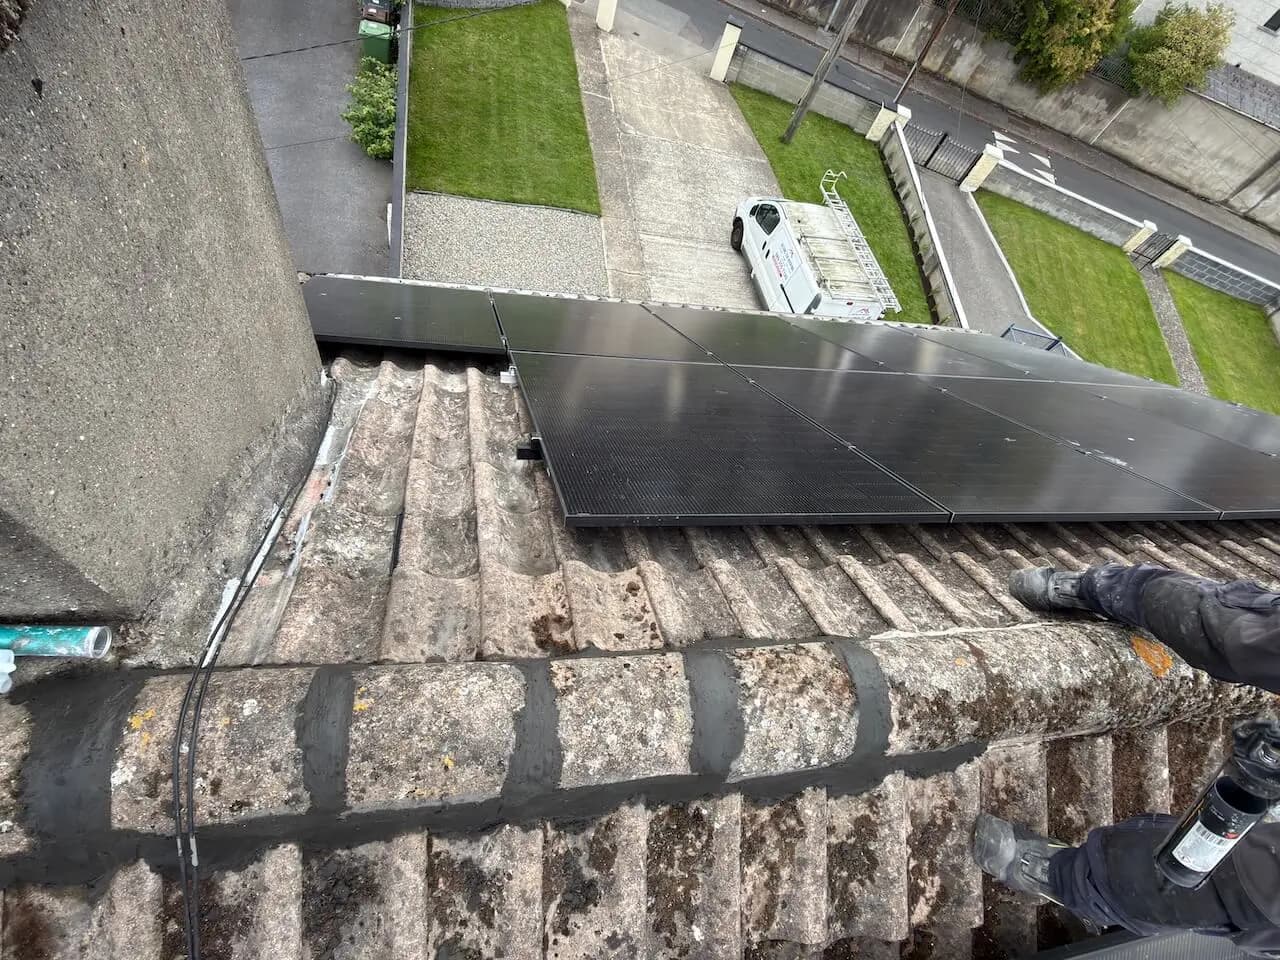
We inspected the caps, removed loose, cracked or degraded pointing and renewed the mortar. The completed close-up shows the fresh finish at the ridge end and around the cap joint.
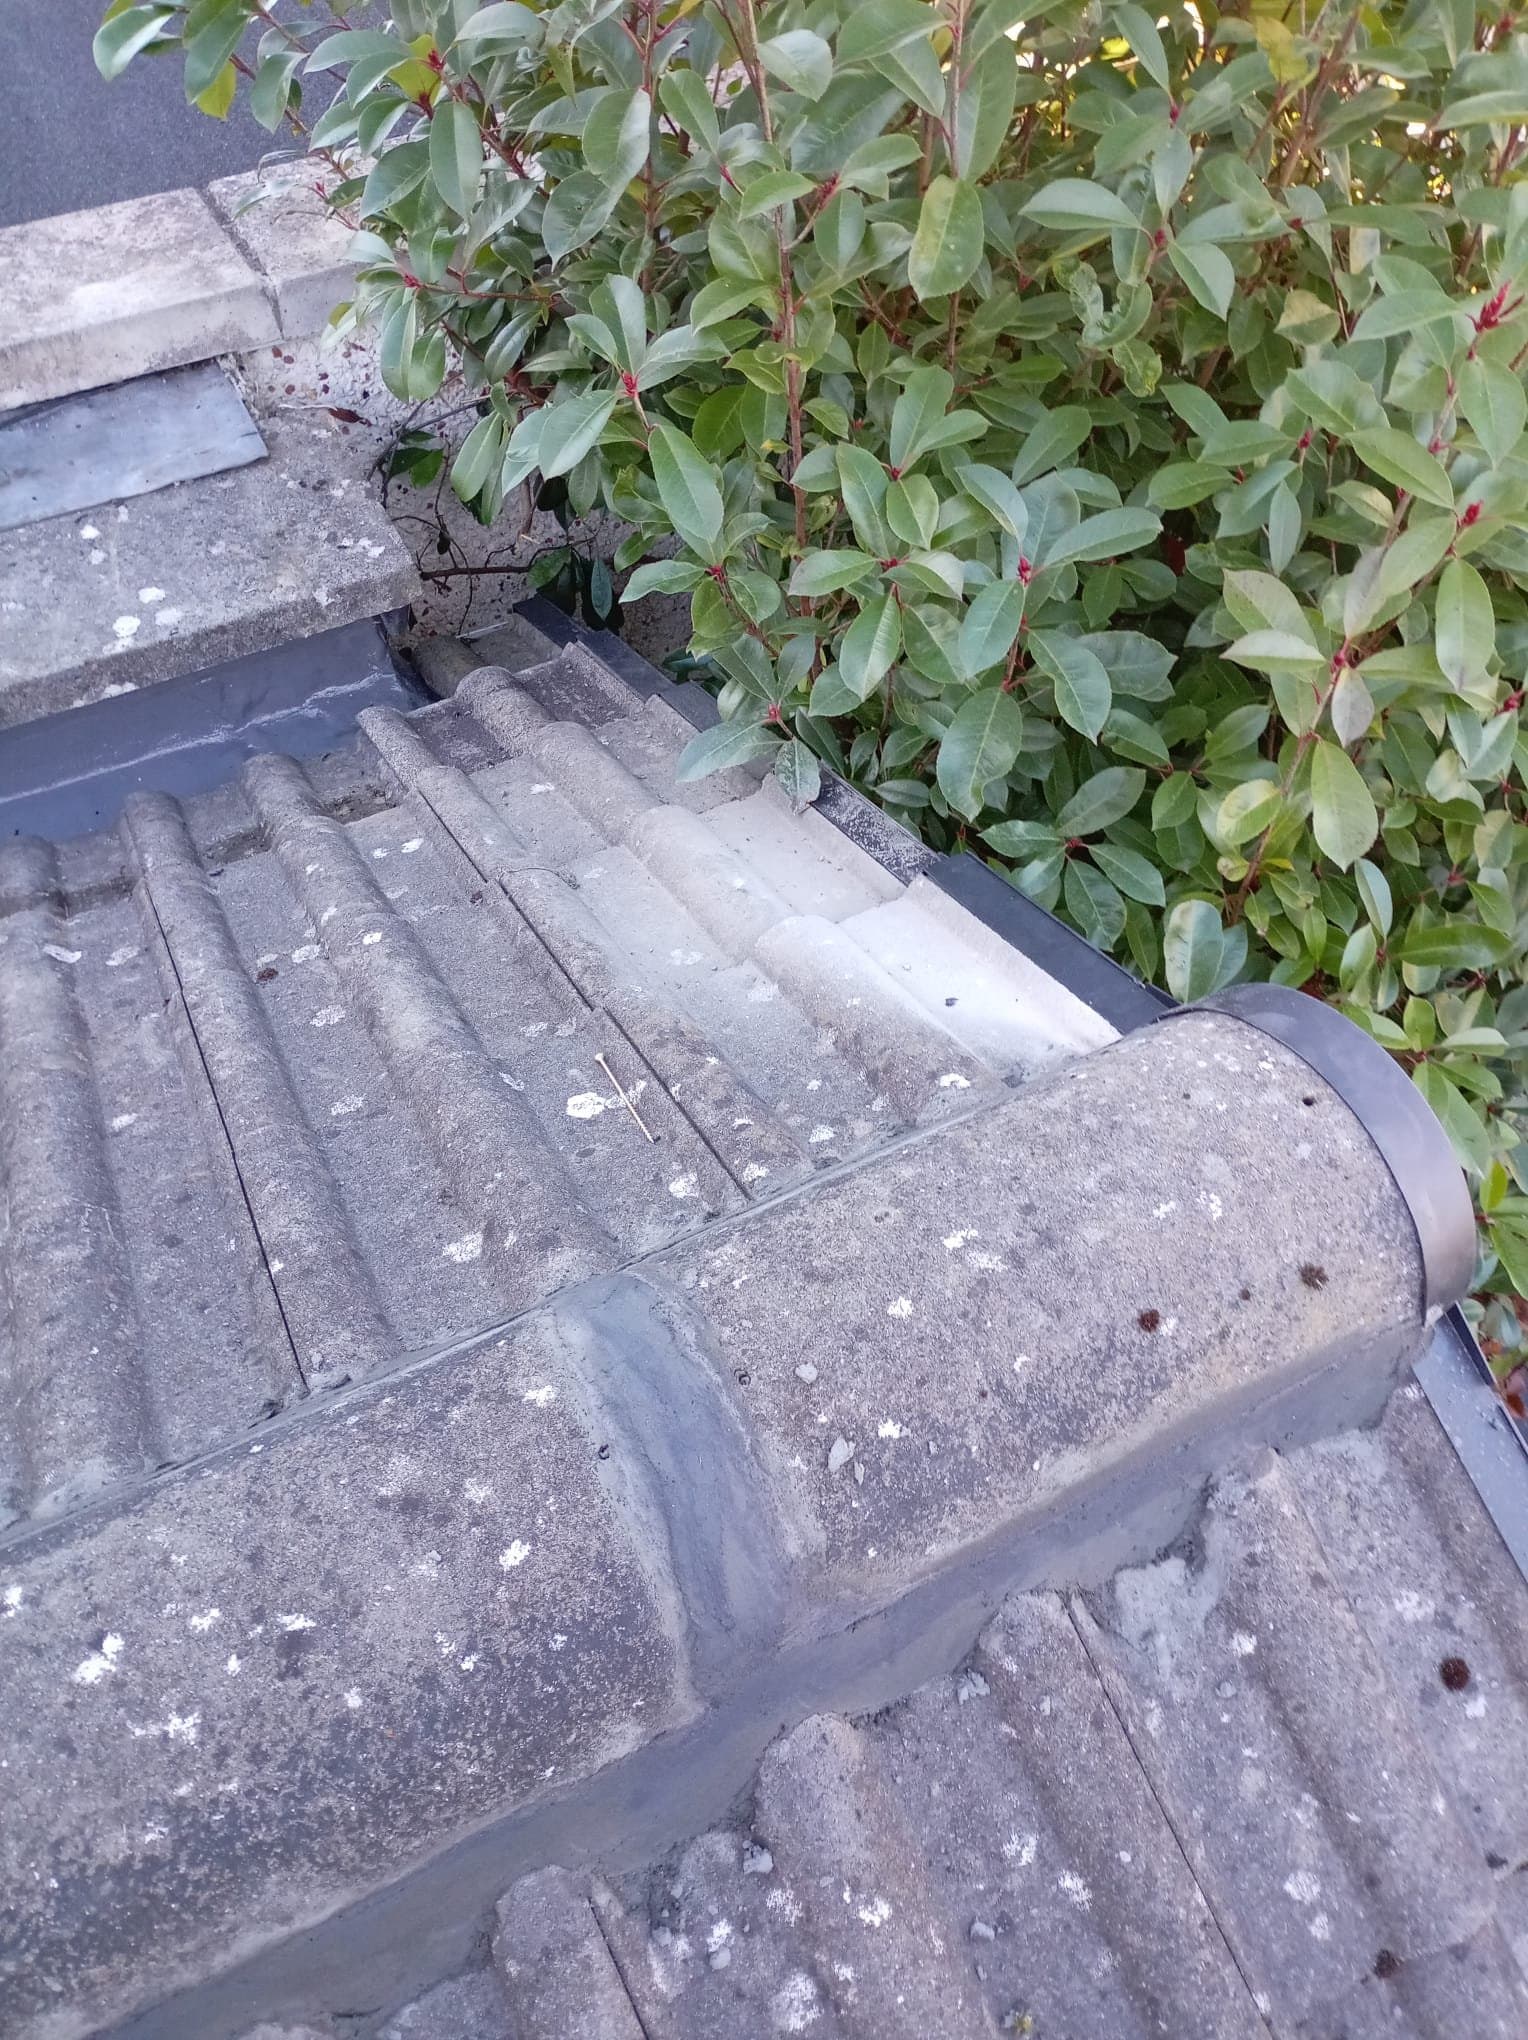
After: fresh mortar around the ridge cap and the protective verge cover at the roof edge.
Repointing suits a ridge where the exposed mortar needs renewal and the caps and their bedding remain sound. If a cap is loose or the mortar bed beneath it has failed, the repair needs to address that condition too. A new surface finish alone cannot secure a loose cap.
Our ridge tile repointing case study explains this distinction using another real Dublin 15 job. It is useful when comparing a quote for repointing with one for more extensive ridge work.
Clearing the channels before sealing the junctions
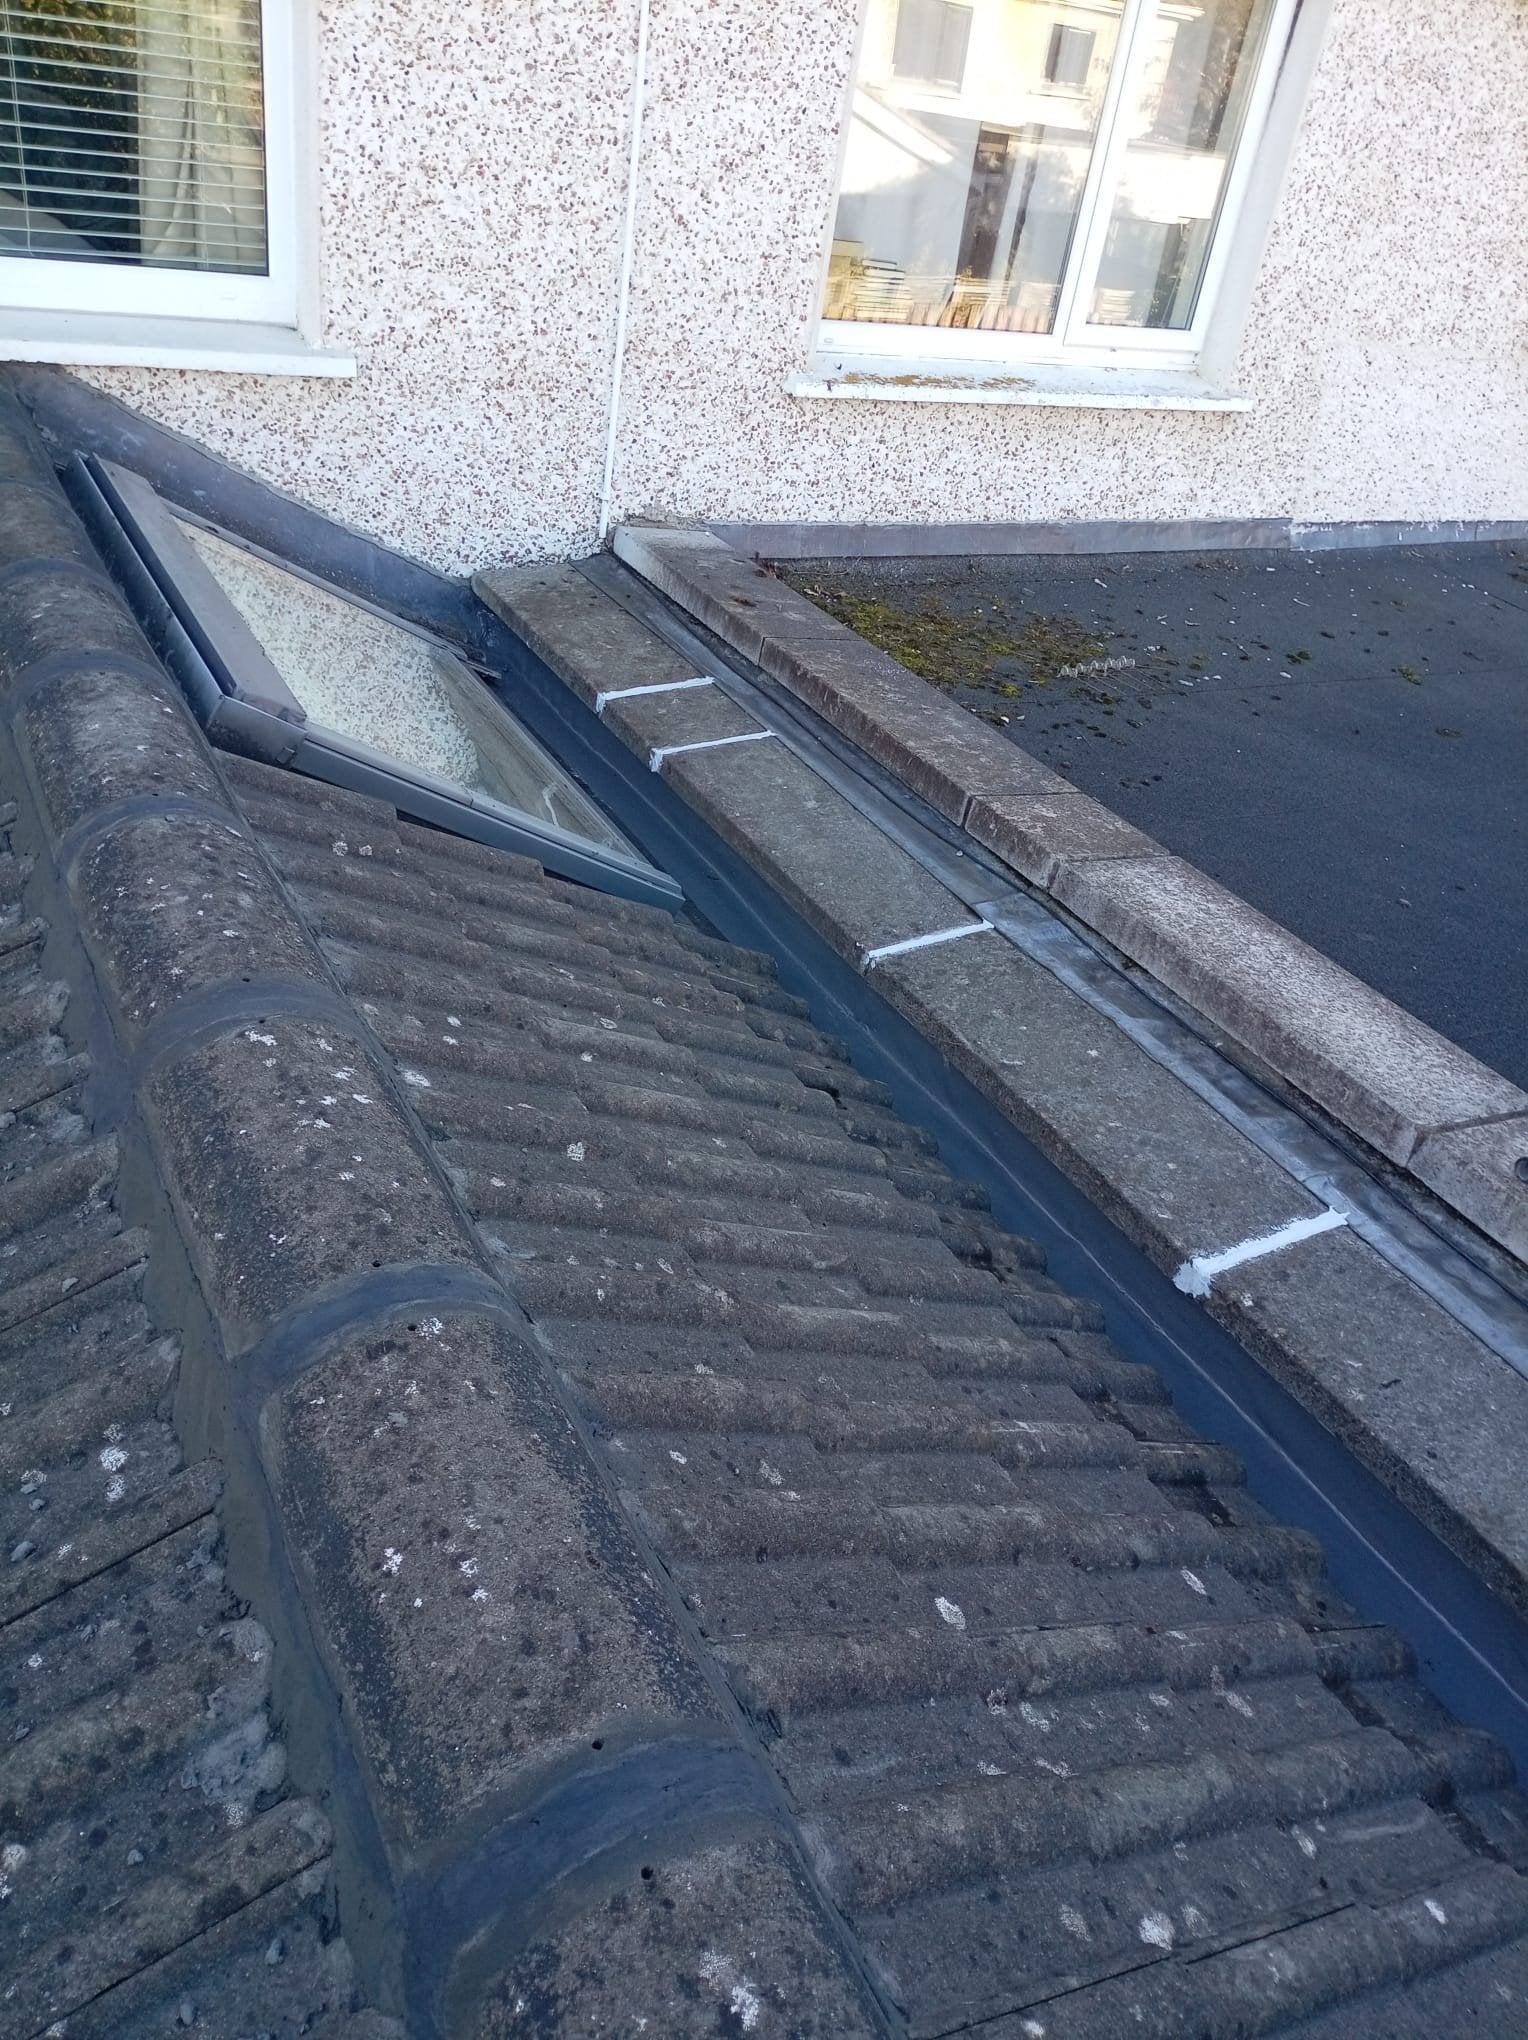
The before photographs show leaves, moss and other debris beside the rooflight and wall. A valley or roof channel provides a route for rainwater to leave the roof. Debris can obstruct that route and make the junction harder to inspect.
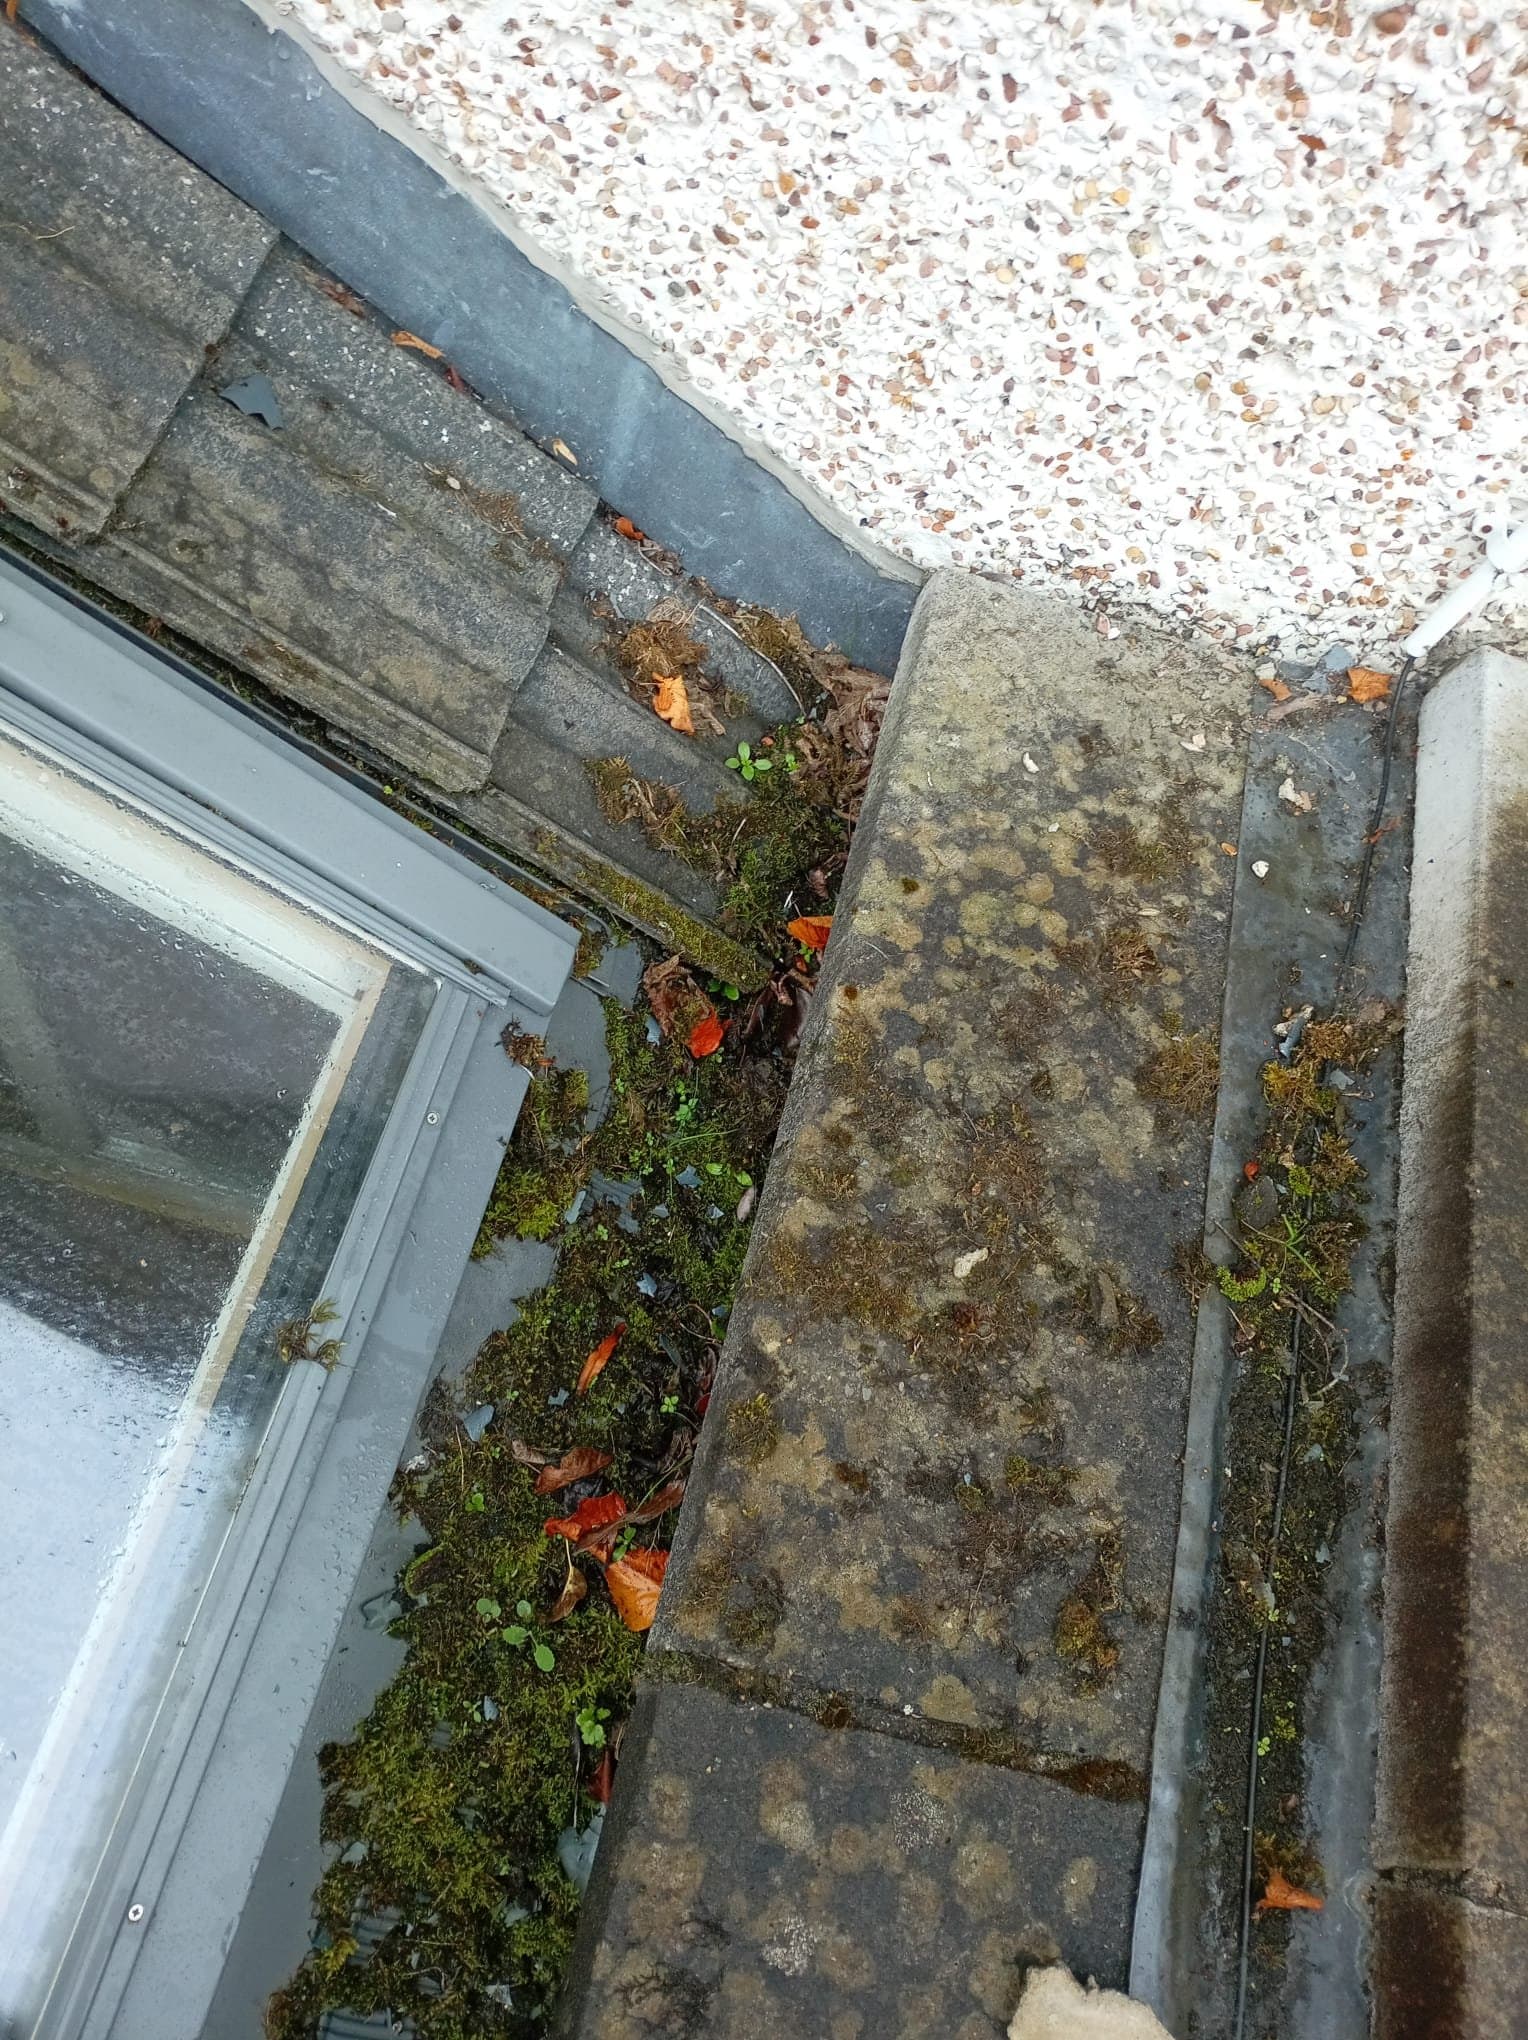
Before: debris in the channel beside the rooflight and the wall junction.
We cleared the debris, inspected the existing valley and flashing, and sealed joints and seams with roofing sealant. Flashing is the metal used to help keep water out where roof surfaces meet other parts of a building.
We then cleaned and prepared the critical junctions and applied Mariseal Detail liquid waterproofing. The finished cover photograph at the top of this article shows the treated channel beside the rooflights, together with the renewed ridge pointing.
The Mariseal Detail product information describes a fibre-reinforced liquid membrane intended for complex roofing details, including flashing, corners and rooflights. In ordinary language, it is a coating used to form waterproof protection around those awkward connections.
The underlying detail still matters. Split flashing, loose materials or poor drainage can call for other repairs. A coating should be chosen for the condition found on the roof, with suitable preparation. This job combined clearing, joint sealing and waterproofing rather than treating the coating as the whole repair.
Dry verge covers along the gable edges
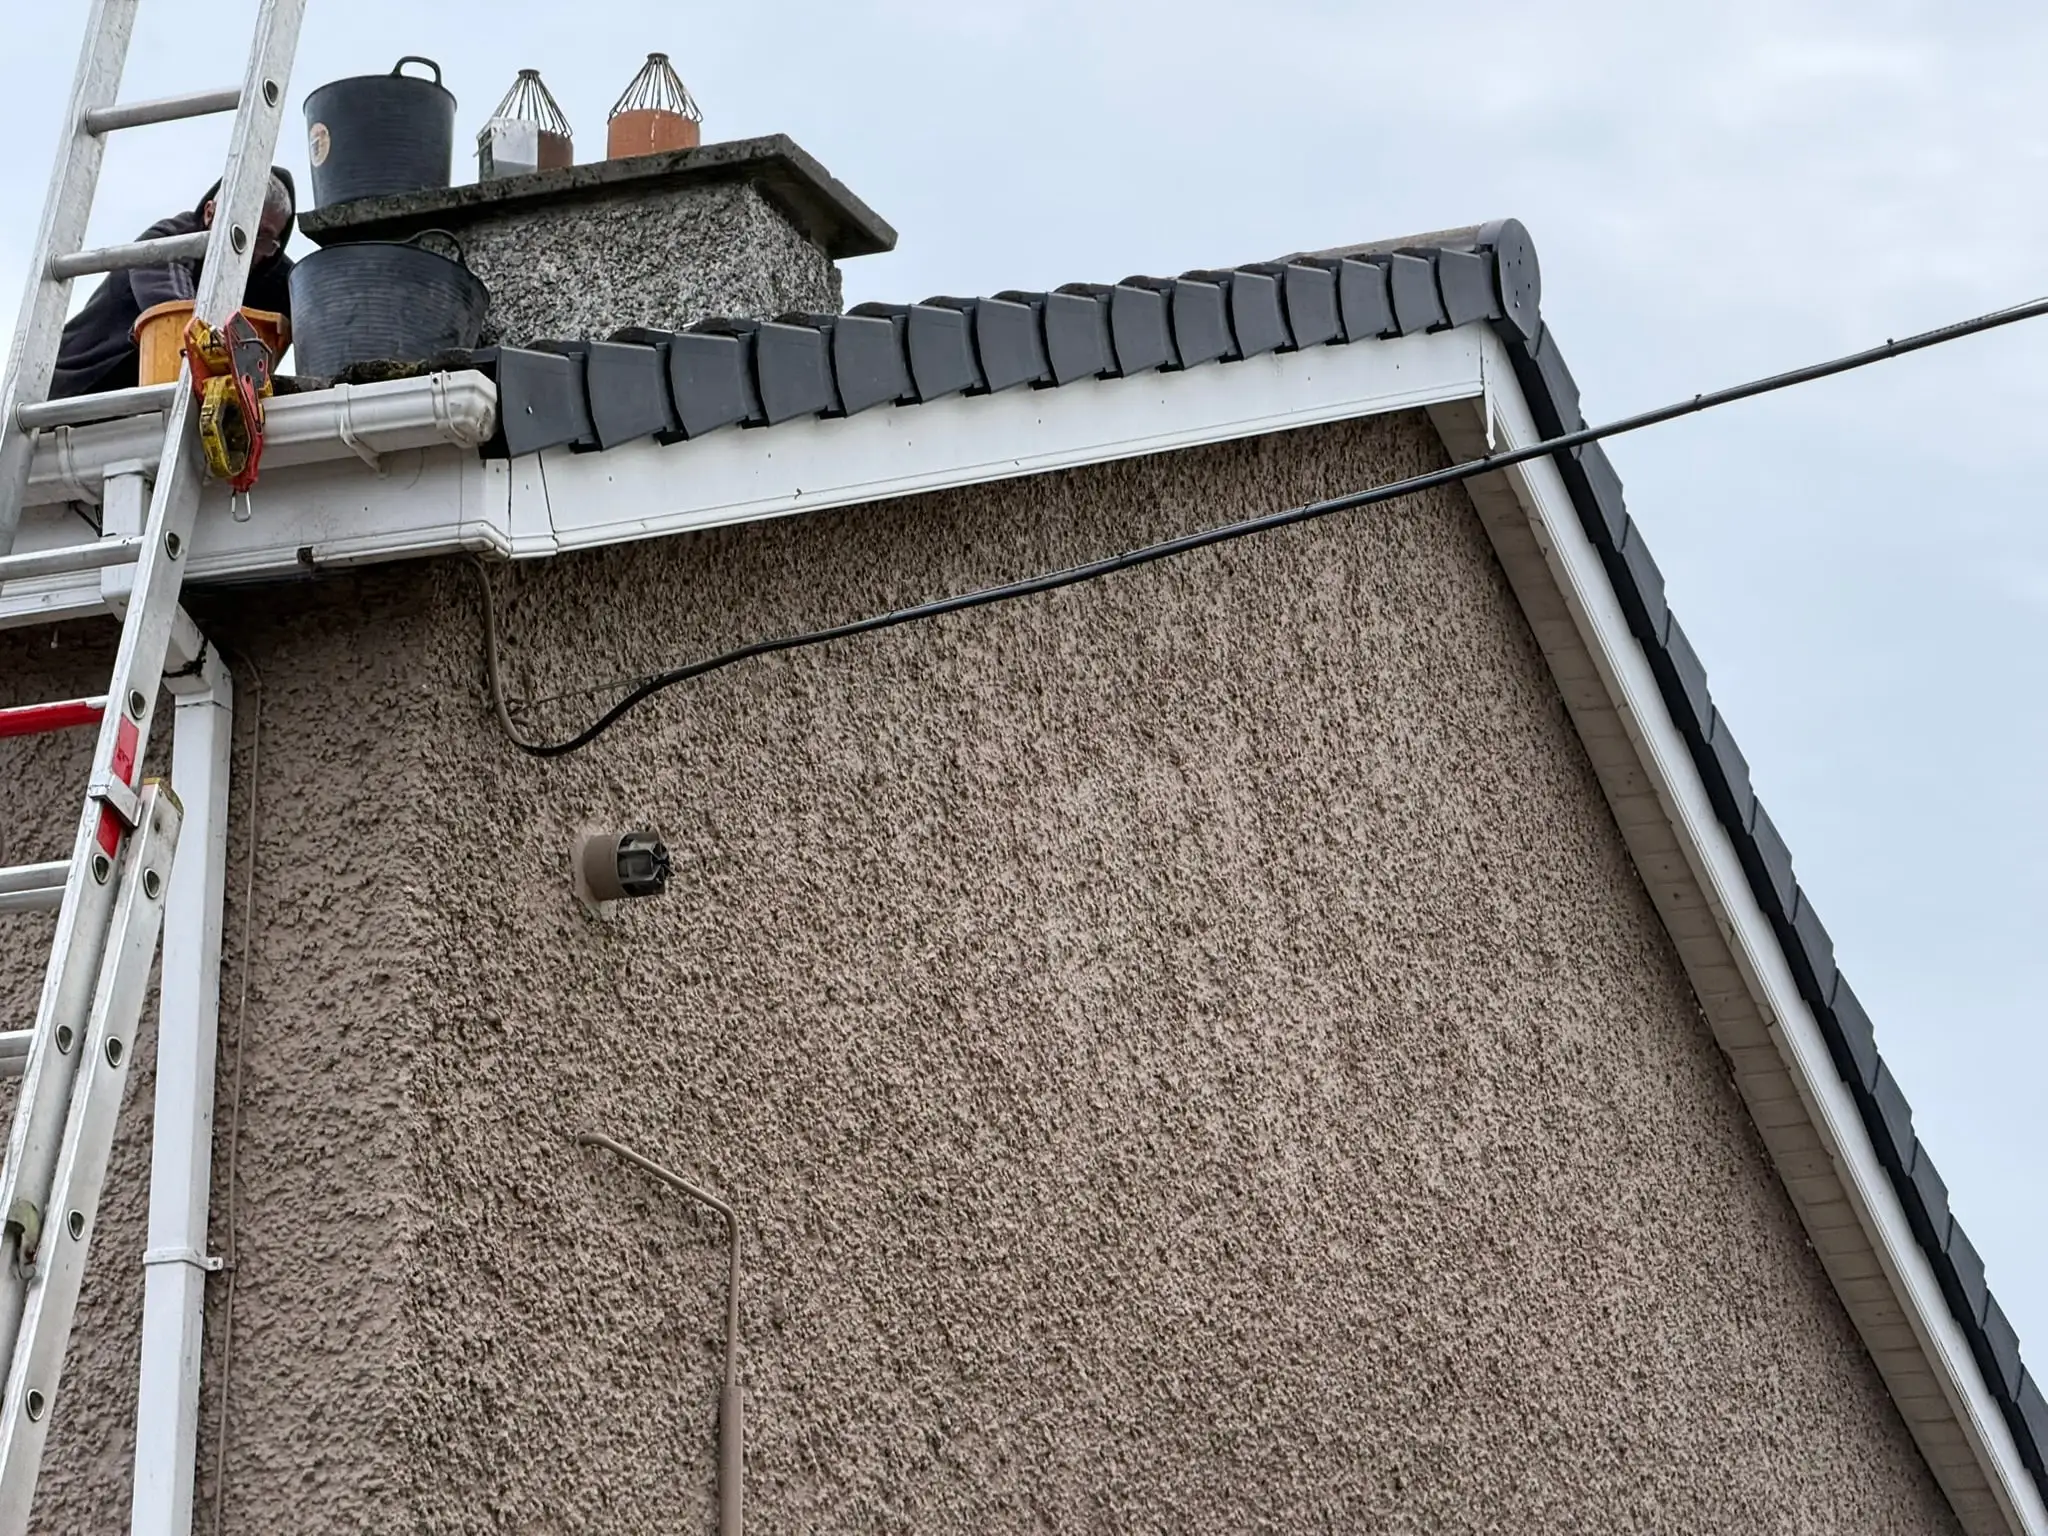
The verge is the sloping outer edge of the tiled roof at a gable. The original photograph shows exposed tile ends above the fascia, the board running along that edge.
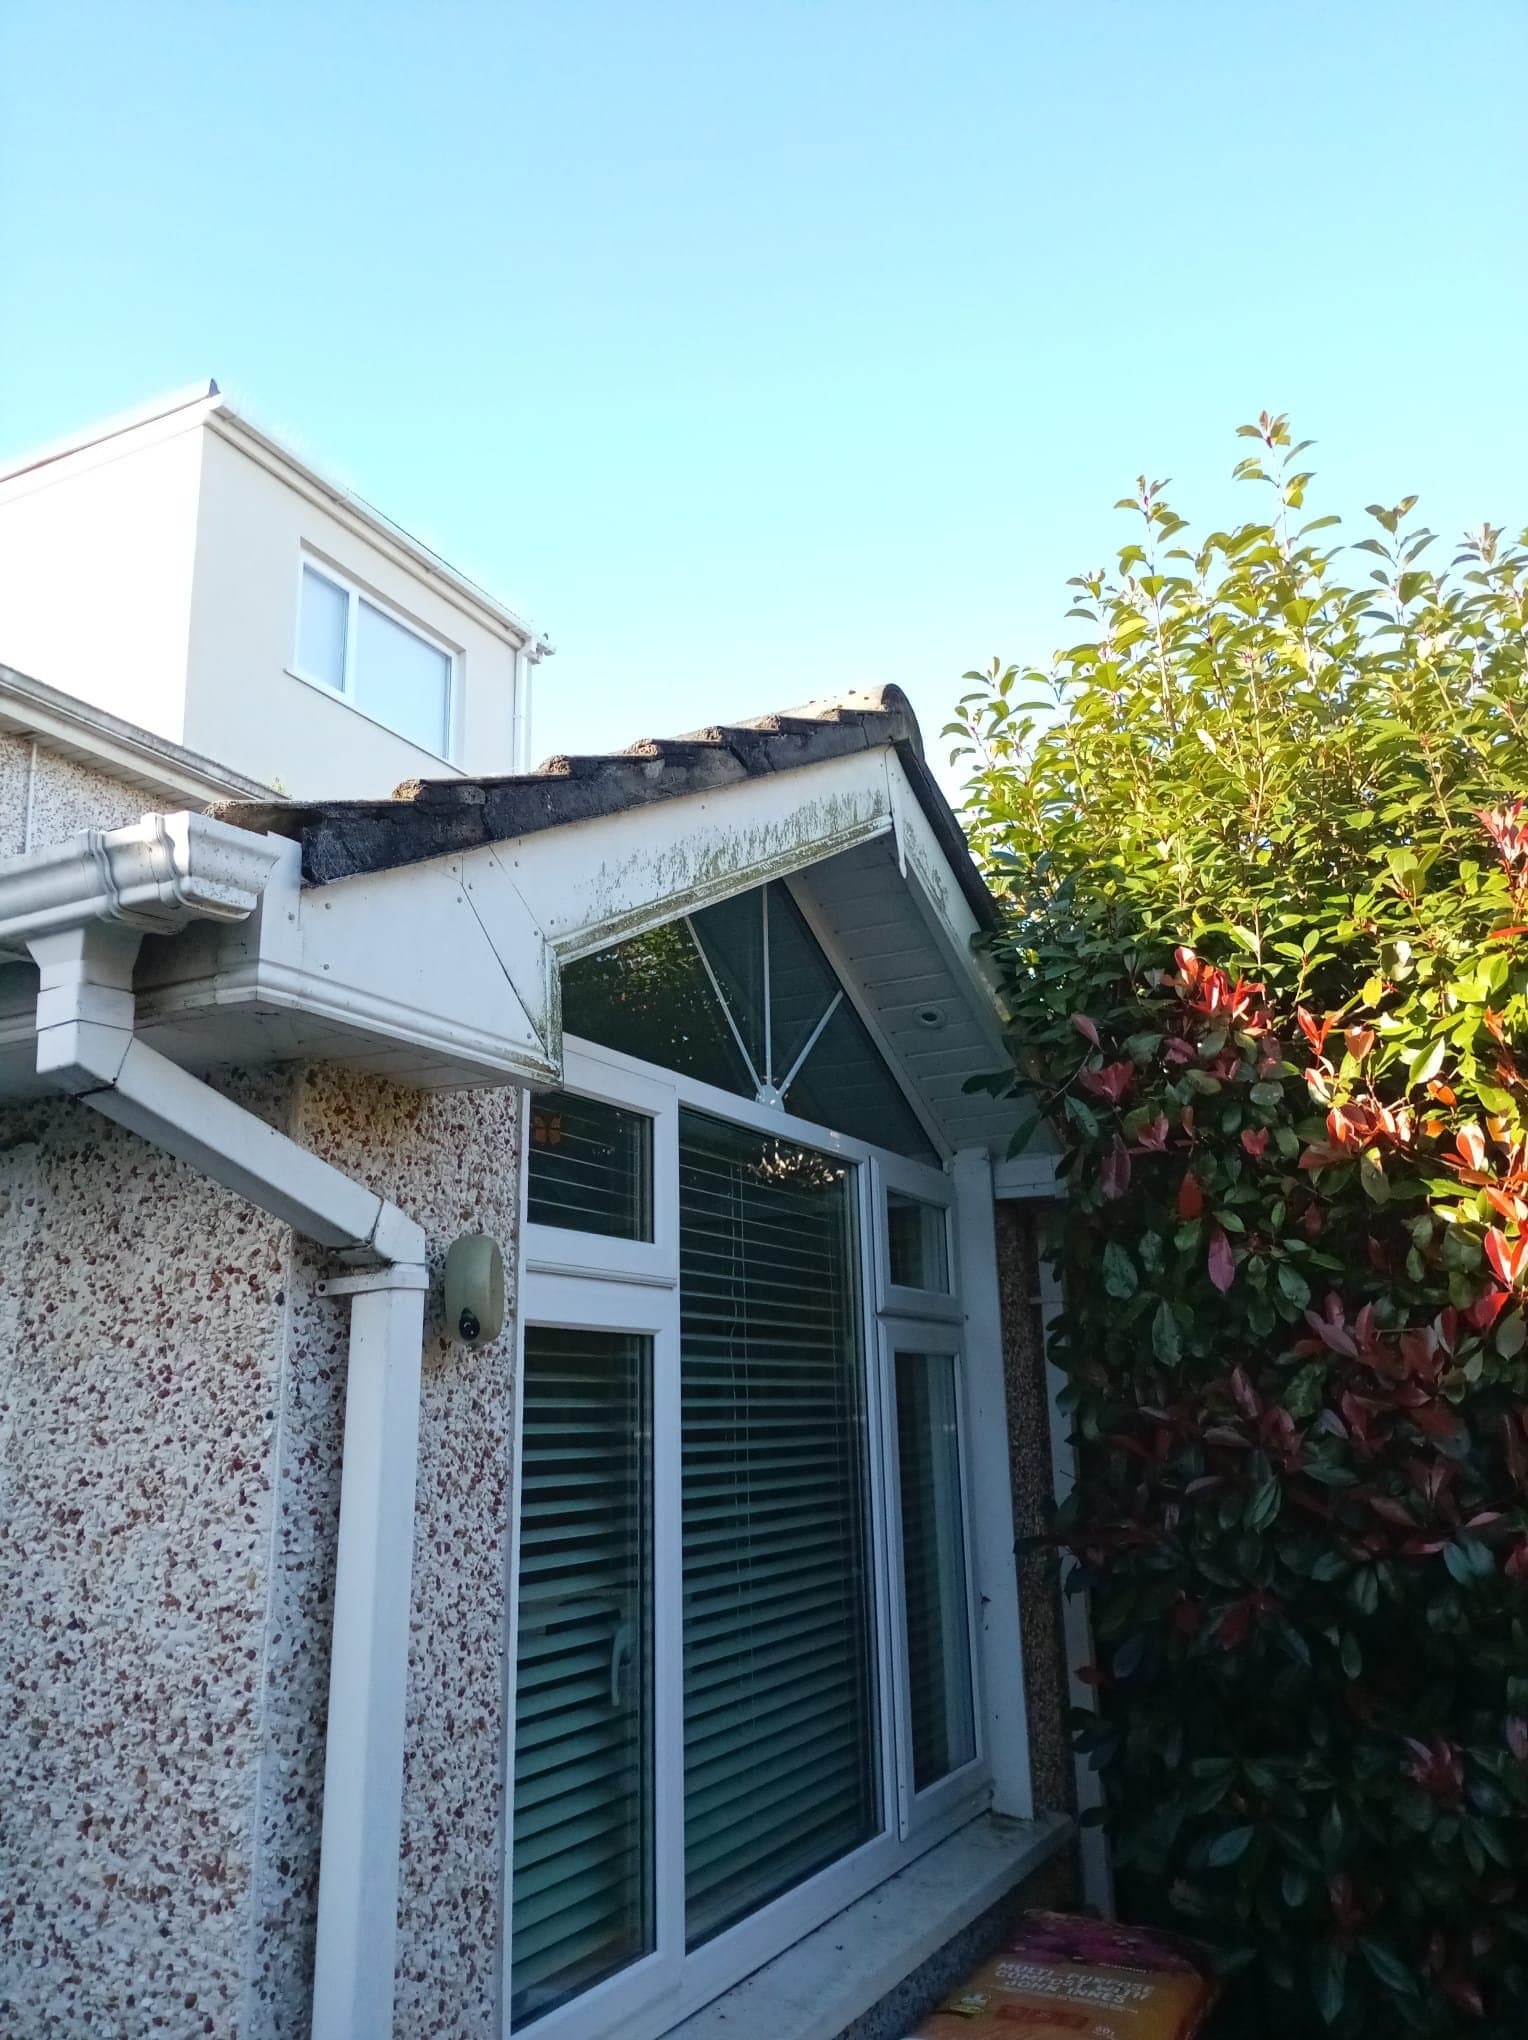
Before: the extension’s gable edge, viewed from ground level.
We fitted dry verge units along the roof edges. These mechanically fixed covers protect the tile ends and give the edge a continuous finish. The after photograph shows the completed run of grey units.
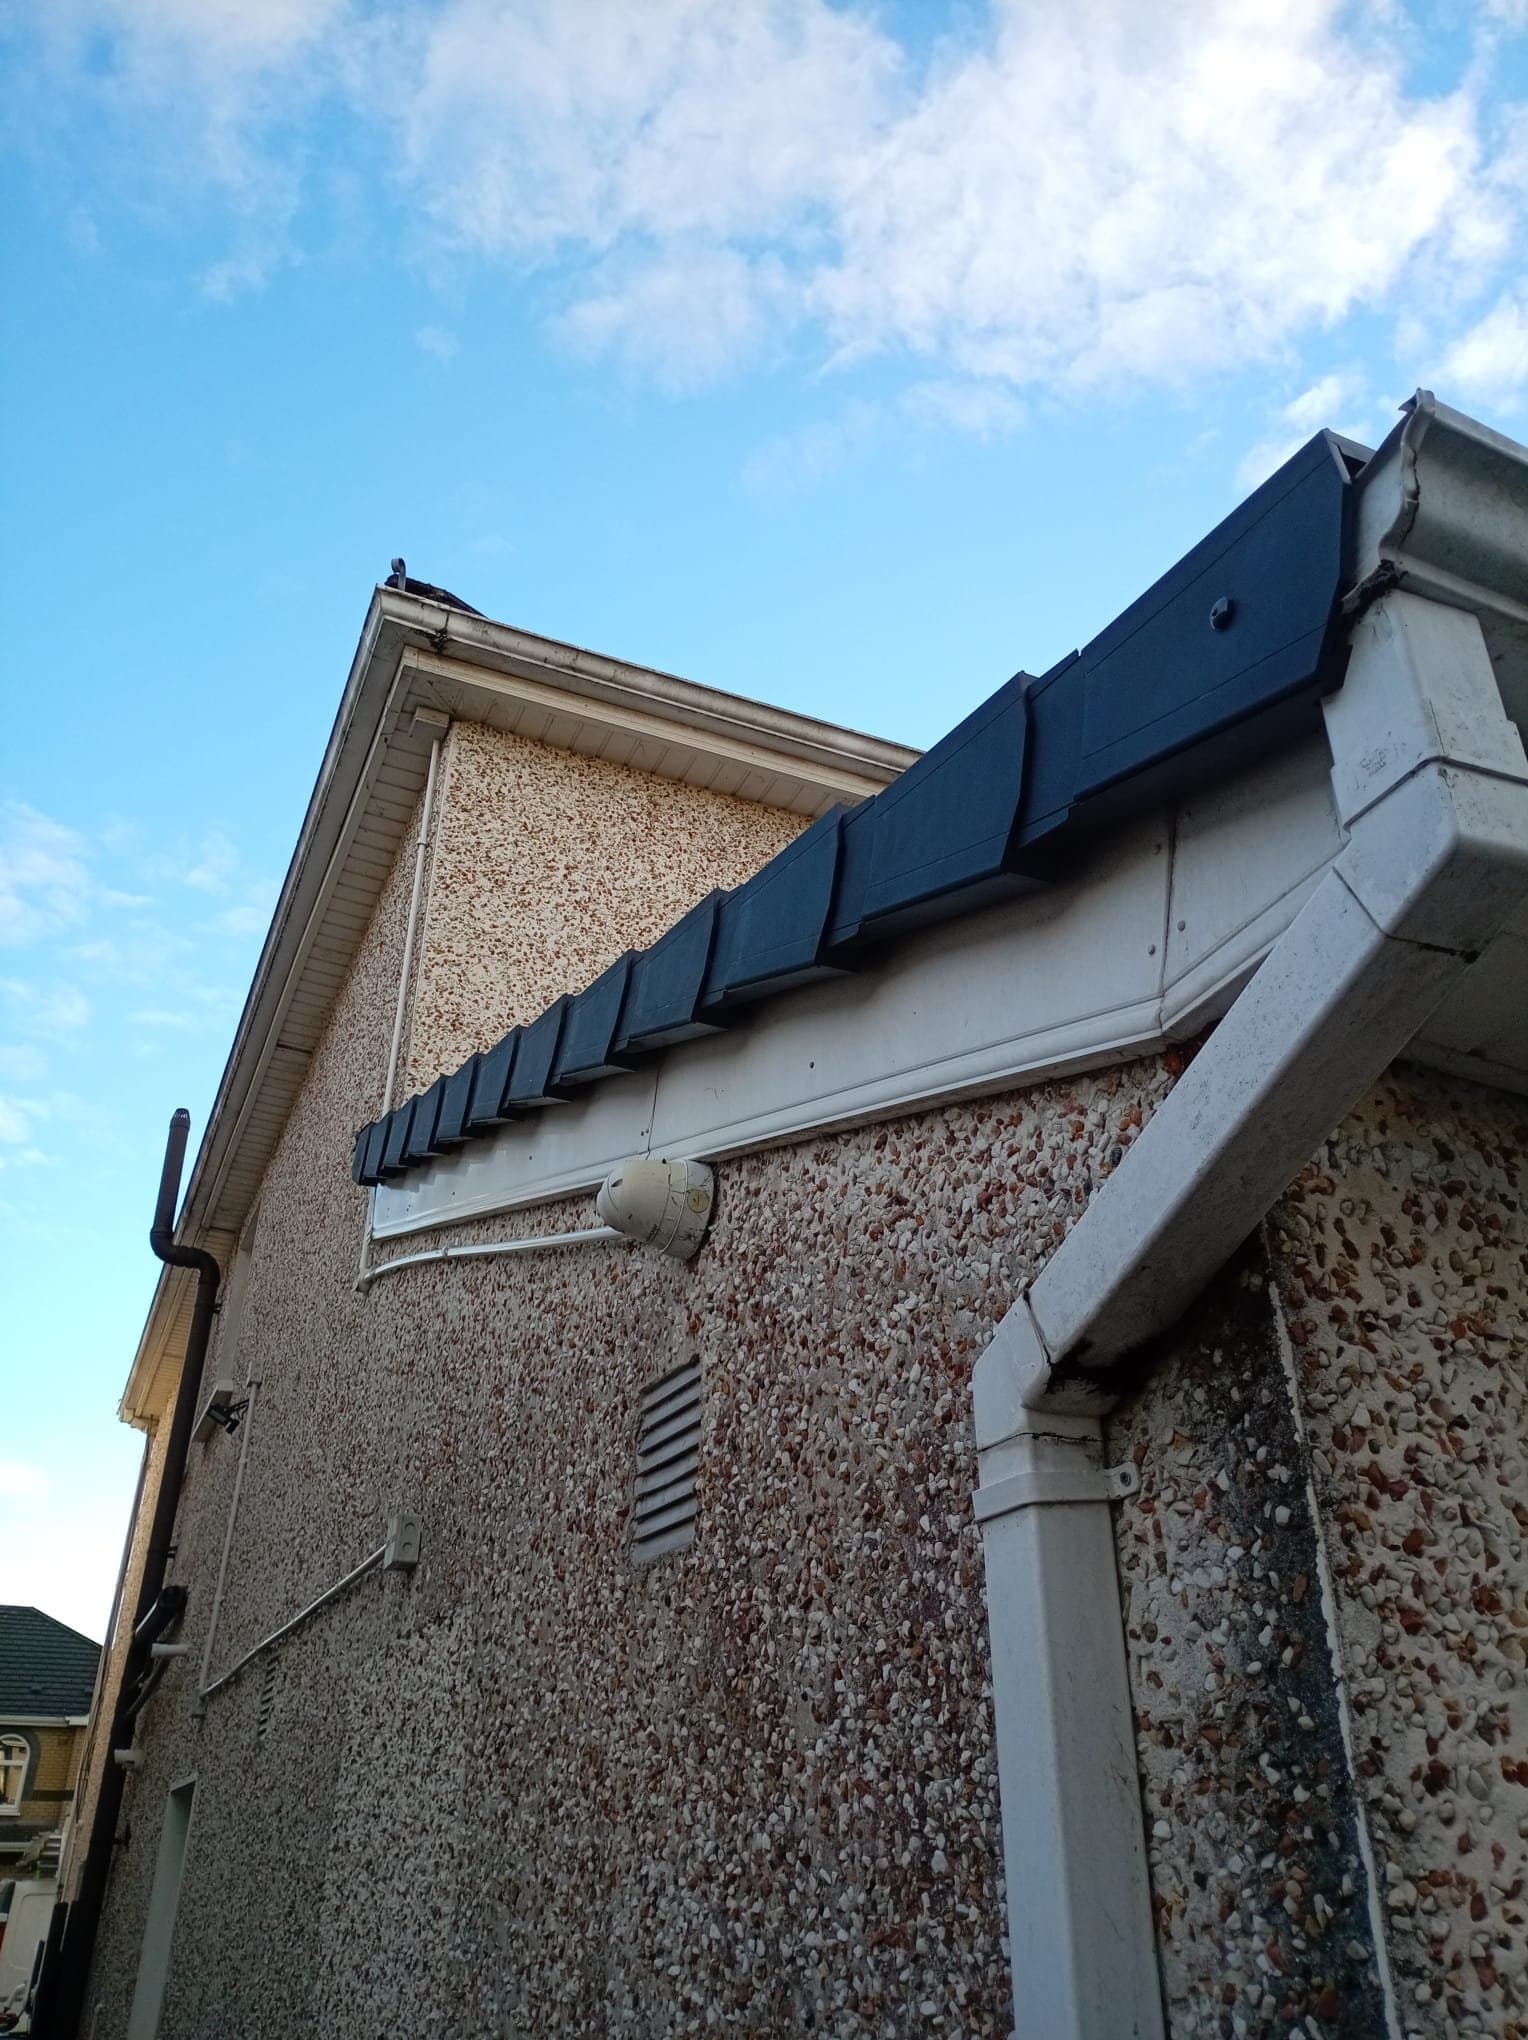
After: the dry verge units covering the exposed edge of the roof tiles.
Dry verge and dry ridge describe different parts of a roof. This job used dry verge covers at the gable edges and mortar repointing around the ridge caps. Our dry verge and ridge installation options explain the systems in more detail.
The dry verge work does not mean the fascia or gutters were replaced. The completed scope included clearing gutters of job-related waste, which is separate from replacing those components or carrying out a full gutter-cleaning service.
What homeowners can record safely
If similar roof details need attention, a few clear observations can help an assessment. Keep them to ground level and safe indoor positions; roof access, lifting tiles and clearing high-level channels are work for someone equipped to do them safely.
Record an extension roof concern safely
Gather information from ground level and safe indoor positions before arranging an assessment.
Supplies Needed:
- Notes app or notebook
Tools Needed:
- Phone camera
Step 1: Photograph the visible roof edge
From the ground, take an overview of the extension. Use your camera zoom if it helps show a gap or damaged edge. Do not climb for a closer view.
Step 2: Record any indoor signs
If there is a ceiling mark or drip, photograph it safely and note its position and whether it changes after rain. Keep clear of wet electrical fittings.
Step 3: Describe the concern when arranging an assessment
Share the photographs and observations. Ask for the ridge, drainage channels and adjoining junctions to be assessed before agreeing the repair scope.
Questions about the work
Frequently Asked Questions
A clear scope for a similar extension repair
Ask which ridge joints need attention, what will be done in the channels and where waterproofing will be applied. The quote should also identify the roof edges receiving dry verge units and the cleanup included. Those details make it easier to understand what the work covers.
We have not published a price for this job. The Dublin roofing guide prices offer broader context; your quote depends on access, materials, the amount of work and the condition found during assessment.
For extension roof repairs in Clonsilla, request a roof assessment with the observations you have safely recorded. We are based in Blanchardstown, Dublin 15, and will explain the proposed scope in plain language before work starts.
Understand what your extension roof needs
Arrange an assessment of the roof details and get a clear explanation of the proposed work.
✅ Free Quote • No Hidden Costs • Same-Day Response